In a world where sustainable energy is becoming increasingly vital, exploiting the power of the sun through solar panels is an innovative action towards a greener future. As a top company in the solar panel industry in Azadpur, Solar Sense is committed to the proper utilization of sustainable and renewable resources and helping others to utilize them as well. If you also have doubts about how to install solar panels for your home, you are in the right place.
We will provide in-depth knowledge about how to install solar panels for your home. If you’re also considering installing solar panels for your home, this comprehensive guide will walk you through the process, from initial planning to enjoying the benefits of renewable energy.
Learn how to install solar panels for your homestep by step from our solar panel installation experts:
Step 1: Evaluate Your Energy Needs
Begin by understanding your household’s energy consumption before installing a solar panel in your home. Look at your past electricity bills to determine your average usage. This assessment helps you figure out how many solar panels you’ll need to meet your energy requirements.
Step 2: Research and Plan
Before diving into installation, our experts advise researching local regulations, permits, and incentives. Planning your solar panel layout and assessing your roof’s suitability are crucial steps recommended by our experts.
Step 3: Choose Your Solar Panels
Selecting high-quality solar panels is key. Our experts suggest considering factors such as efficiency, durability, and warranty to ensure long-term performance and savings.
Step 4: Find a Reliable Installer
Though doing it yourself is an option, our experts strongly advise working with a professional installation. Skilled installers guarantee optimal system performance, safety, and regulatory compliance.
Step 5: Site Assessment
Rely on our experts’ advice to let professionals conduct a thorough site assessment. This step ensures the best placement for maximum energy production and system efficiency.
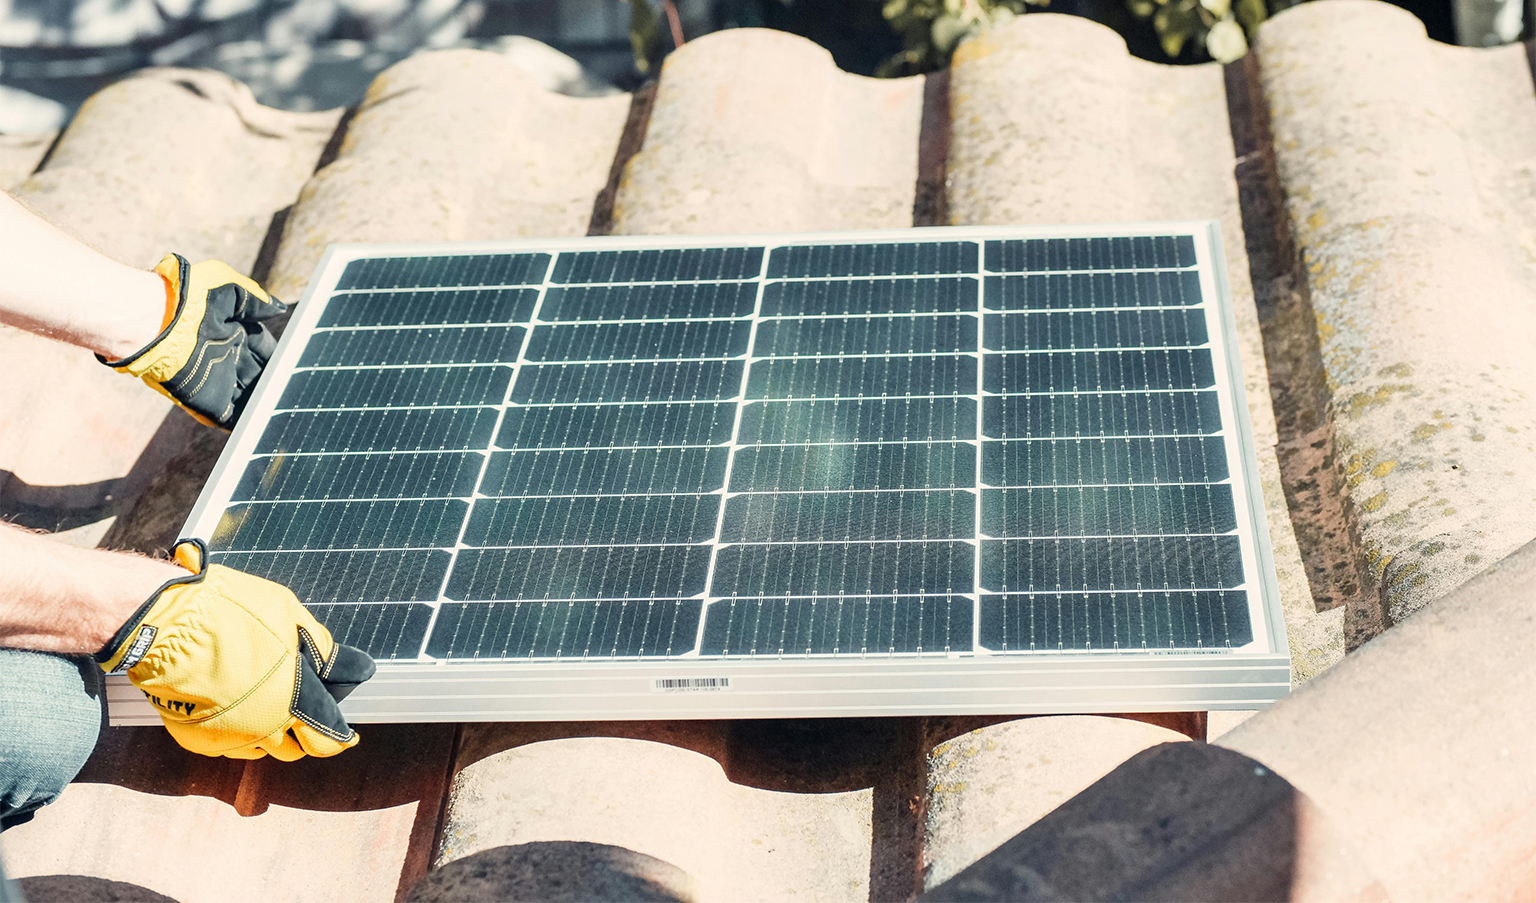
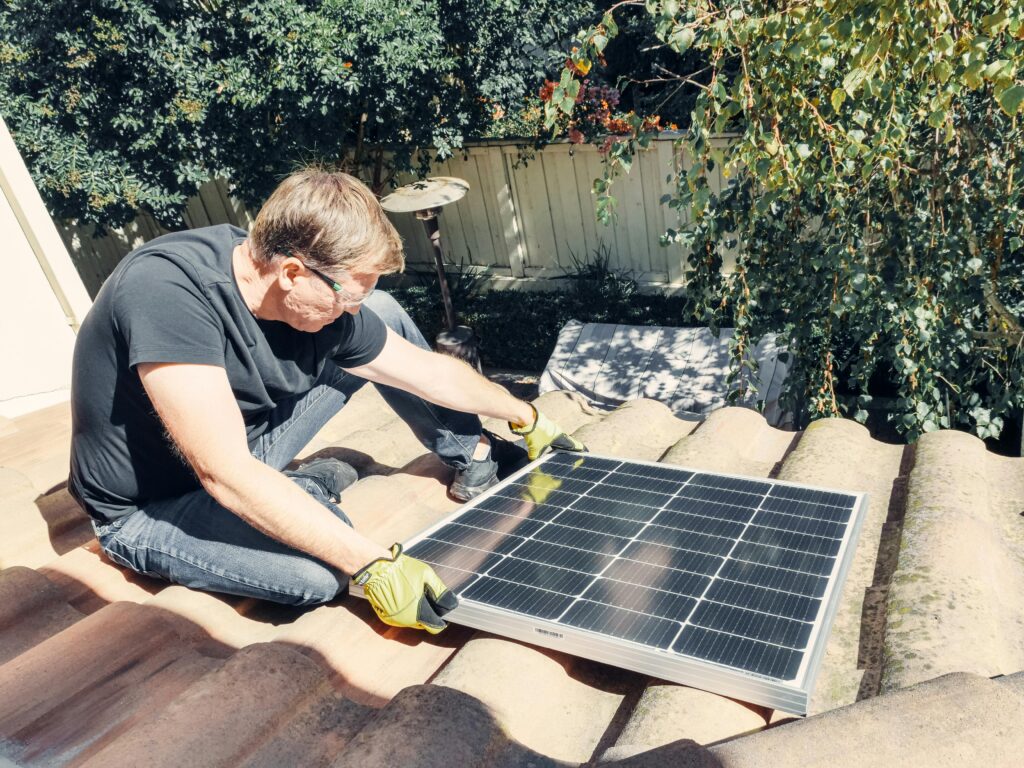
Step 6: Installation Day
Trust our experts and their recommended installers to handle the mounting and connection of your solar panels and inverters. Proper installation is critical for a seamless and efficient system.
Step 7: Electrical Connections
Our experts emphasize the importance of professional electrical connections. Certified installers will ensure your solar system integrates seamlessly with your home’s electrical setup.
Step 8: Inspection and Approval
Count on our experts to guide you through the inspection process. Meeting safety and building code requirements is essential for system approval and activation.
Step 9: System Activation
Follow our experts’ guidance for activating your solar panel system. Register for net metering if applicable and enjoy the benefits of renewable energy.
Step 10: Monitor and Maintain
Our experts recommend regular monitoring and maintenance to keep your solar panel system running efficiently. Cleaning panels and scheduling maintenance checks are essential for optimal performance.
Step 11: Enjoy Renewable Energy
With our experts’ advice, you can confidently embrace renewable energy. Experience reduced electricity bills, environmental benefits, and energy independence with your solar panel installation.
The demand for solar panels is rising due to increased energy prices, affordability, and kit availability. DIY solar panel installation provides a cost-effective way to generate renewable electricity and self-sufficiency. Solarsense Solar assists in building solar panels for energy security and off-grid properties. Most people, including those without electrical training, should not attempt DIY solar installations. The guide covers planning, permitting, interconnection, and maintenance of a solar project. But it’s crucial to weigh the pros and cons before undertaking it alone.
Many people are more concerned about installing solar panels themselves and the Google trend shows a high level of inclination in the past few years. This I believe corresponds with increased awareness of the need for effective and renewable sources of energy such as solar power. A large population means more consumers of electricity, hence the cost of electricity goes up. DIY solar panel installation in Delhi appears to be a viable solution for the generation of electricity as it becomes cheaper and potentially makes the owner independent of the existing grid for electricity. Therefore, bringing down the electricity bills.
The Solar Energy Industries Association (SEIA) suggests that DIY solar panel systems can save 20-50%, but this doesn’t include potential mistakes or hiring professionals. Professional installers completed 72% of installations in a 2020 survey, implying that the technical complexity might discourage some from attempting DIY projects. Government rebates and tax credits for solar installations in Delhi may be contingent on professional installation, and the Database of State Incentives for Renewables & Efficiency (DSIRE) is a resource for finding specific solar incentives in your area.
How much DIY solar panel costs?
Wood Mackenzie’s June 2023 report reveals that nearly half of the cost of a turnkey solar system is spent on the installer’s overhead, customer acquisition costs, and labor. Installing solar panels yourself could save almost 50% compared to using a big company, especially if you find good prices on panels and components. However, there is a risk of overspending with professional solar installers due to tax incentives and credits.
Discovering Energy Needs: Calculate energy needs by considering appliances, lights, and other electrical devices for your solar system. Use a step-by-step solar sizing guide to determine the required panels.
Analyzing Your Property and Selecting the Best Location: Choosing the optimal location for solar panel installation involves considering factors like shading, orientation, roof space, and daytime sunlight availability, ensuring no obstructions.
Select the Perfect DIY Solar Kit: Choose a suitable DIY solar kit and consult with a solar expert for expert guidance.
Buy the best DIY solar panels: Select from various financing options for solar panel installations. Ensuring you choose the one that best suits your budget and financial situation.
Get the Right Tools Handy: The list includes hand tools, measuring tools, safety equipment, fall protection, ladder, power drill/driver, power saw, battery, pry bar, and caulk gun.
Purchase the necessary materials not included in the kit: Most DIY solar panel kits come with the kit, but some require purchasing and electrical wiring is usually not included.
Get Safety Equipment: The size and complexity of the system and the specific hazards in the work environment determine the required safety equipment.
DIY Solar panel installation steps
1. The first step is to install the Racking system:
To install a roof-mounted kit, mark the location of the roof rafters as the foundation for your solar array. Use a stud finder or measure them from inside your attic. Mark the rafters with a chalk line to see the racking rail layout. Bolt the flashing to the rafters.
Or, if you are installing it on the ground. The ground mount requires a standalone metal foundation to support the solar panels, which require drilling 18-inch-deep holes and pouring concrete footings. To comply with the National Electrical Code (NEC), wiring must be buried underground. Renting machinery for digging and anchoring is recommended. The metal substructure then secures the racking rails to the support structure, which provides a foundation for the panels.
Microinverters should be wired before installing solar panels, while string inverters should be wall-mounted in easily accessible locations for efficient wiring and cost-effectiveness.
3. The third step is to Solar panel installation process:
Installing solar panels on racking is easy. Use two end clamps to install the first panel, then use grounding mid-clamps for each consecutive panel. Secure the last panel with two more clamps. If installed on a roof, hook up the connecting wires before bolting the panel to the racking rail, as they will be inaccessible once installed.
4. Now, the fourth step is or next task is to install the battery:
Site Preparation:
Identify the installation location and ensure it meets space, ventilation, and access requirements.
Prepare the installation surface to support the weight of the battery and install the mounting bracket.
Electrical Installation:
Install AC and DC wiring and current transformers (CTs) as per manual instructions.
Ensure proper grounding of AC and DC circuits.
Connect the battery to the gateway for commissioning.
Mechanical Installation:
Mount the battery onto the prepared surface using mounting brackets.
Commissioning:
Configure the battery, verify it’s communicating with the monitoring system, and confirm system operation.
Discover the manufacturer’s installation manual and follow all directions and safety precautions.
5. The last step is for the Wiring the system
The final installation step involves wiring the system components according to your manual, routing wires from inverter(s) through a junction box and a PV disconnect switch.
Crucial Steps for Smooth and Efficient Function for DIY Solar Panel Installation
After installing your solar system, schedule and pass a solar inspection to ensure safety and compliance with local regulations. Contact your local building department for information about inspections and to schedule an appointment. Prepare your system for inspection, making sure it is easily accessible and equipped. Attend inspections, which may require repairs or modifications. After obtaining a permit to operate (PTO), install a monitoring system to detect problems and ensure optimal system functioning. Connect to the Internet, register your system, set up alerts and notifications, and monitor your system regularly to identify areas for improvement. Regular maintenance, such as checking for debris, damage, the inverter, battery system, and monitoring system, is important for optimal performance.
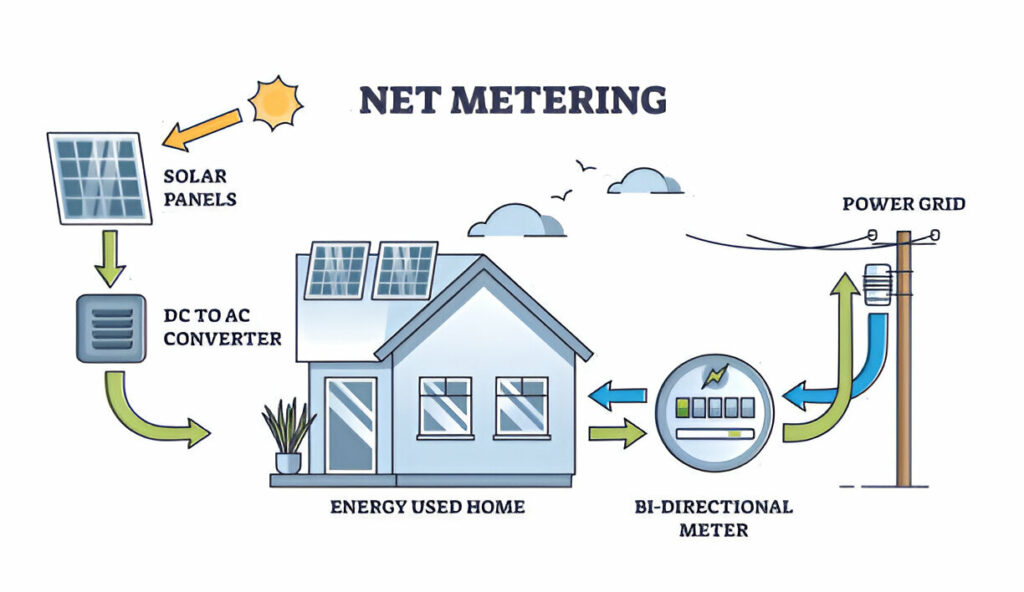
Net metering is a solar energy billing mechanism that lets users reduce their electricity costs by sending excess solar energy back to the grid. This system is crucial to the renewable energy mission in India, making solar energy cost-effective for consumers, allowing them to cut down on their electricity bills, thereby helping in a more sustainable environment. Net metering enables users to sell the surplus energy generated by their solar installations to the utility electricity grid, helping them save on utility bills when their solar energy production is insufficient.
This feature enhances the viability of solar energy by charging customers for the net energy they purchase. Which is the difference between the energy they consume and the energy they generate and feed into the grid. Net metering policies have encouraged corporate investment and contributed to expanding public attitudes, primarily in favourable conditions. Enabling net metering ensures that investments in solar energy use will contribute to the green energy transition.
what is net metering?
Net metering (NEM) refers to a billing framework that allows owners of solar energy systems to keep track of the energy contributed to the system and the subsequent cost of the energy consumed. Whenever solar panels generate surplus power after meeting demand. It is available to the grid, which consumers can use. When their solar panels are off – for example, at night or during cloudy days.
The energy provider installs a bi-directional meter at the supply point, and users are charged based on the net energy used, which is the total energy consumed minus the energy they generate. This arrangement reduces the need for customers to buy expensive solar batteries, as any excess energy is available free of cost.
This system works in such a way that users are paid for the surplus energy sold to the grid and are billed only for the net energy consumed. Different states in India have different policies, where some will allow only one meter while others require a two-meter approach; Energy consumed and electricity produced.
Purpose of Net Metering?
Net metering policies are intended to encourage the use of renewable energy and make the benefits of affordable solar power available to power companies. During the peak summer months, solar power reduces the cost of electricity which is valuable to consumers. Although solar net metering remains the most popular, some states have begun to allow net metering for other sources of renewable energy, such as wind turbines, depending on state law.
solar net metering application?
The net metering installation process is done by applying to your local distribution system operator (DISCOM) for permission to install a rooftop solar system. A site survey of the area will be done within three days to see if the location is viable and a decision will be made after 15 days. The approval from the construction drawing board is followed by applying online on the DISCOM web page, signing the metering impact signing and uploading details such as property documents, installation documents, solar system documents and the suggested net metering charges payable.
Once the documents are submitted, discom officials will conduct a fresh inspection of the already installed solar system. If such requirements are met, a bidirectional meter is connected to the system, making it possible to export the excess energy back and get credit against those energy bills.
How does net metering work?
Excess power production: The net metering system sends the excess power generated back to the grid to meet the additional demand.
Remaining: The utility company tracks any surplus energy and also credits the customer’s account.
Cost Expenses: If your solar panels don’t generate enough power, you purchase electricity from the grid. The system deducts such credits from your monthly electricity bill.
Subsidy Regarding solar Net Metering
In India, homeowners are eligible for government assistance in installing net metering solar systems. The system’s capacity and the installation area determine such subsidies. It is essential to check the Sun Number score for your property and all subsidies available in your area before going ahead with the installation. Calling a solar installer will help you understand eligibility as well as potential savings.
Relationship Between Net Metering and Electricity Bill?
Net metering allows users of solar energy to earn credits on electricity bills for any excess electricity they produce and export. You use the credits when solar energy production levels are low, such as at night or during the winter months. This provides a cost balance for electricity consumption patterns throughout the year that will result in lower monthly electricity bill rates.
Benefits of Net Metering Mechanism?
Bill Control: Generates excess electricity to reduce bills.
Low Maintenance: No need for costly batteries or generators.
Easy Billing: Tracks net energy usage for simplified billing.
Financial Savings: Lowers bills and earns solar credit.
Extra Credits: Surplus energy brings additional credit or revenue.
No Backup Needed: The grid stores excess energy, eliminating battery needs.
Net Metering, Net Billing, and Gross Metering: A Comparison?
Consumers with solar panels use three different methods to measure electricity usage: net metering, net billing, and gross metering. Here’s a breakdown of each system, along with an example to illustrate the differences:
However, net metering and net billing are still more advantageous economically than gross metering policies. The drawback of net metering in this case is the limit of 6kWh net billing within which savings are less than with net metering. Consumers have limited choices, which depend on their energy consumption profiles and the metering policies in their region.
Maximize Your Energy Return?
All of them, net metering, net billing, and gross metering have advantages in lowering electric bills. Though the purpose remains the same, the benefits differ according to the system. In order to reduce saving periods, attempt as much as possible to use renewable energy immediately on generation. This minimizes energy overproduction and stops loss of value.
Other Solar Energy Compensation Plans?
Buy all/sell all: Users of the network buy and sell every unit of solar electricity they produce. Buy back electricity but only at higher rates, use two meters to differentiate between electricity production and electricity consumption, and do not use solar power for any purpose.
Net billing: Users generally keep the surplus energy produced from their renewable energy systems, but this definition is simplified to when they connect to consumption on the grid.
Virtual net metering (VNEM): This technology allows net metering of shared energy production for residents without requiring solar panels on site.
Get in Touch!
By taking the step to install solar panels, you are not only investing in your household, but also in a more sustainable future.
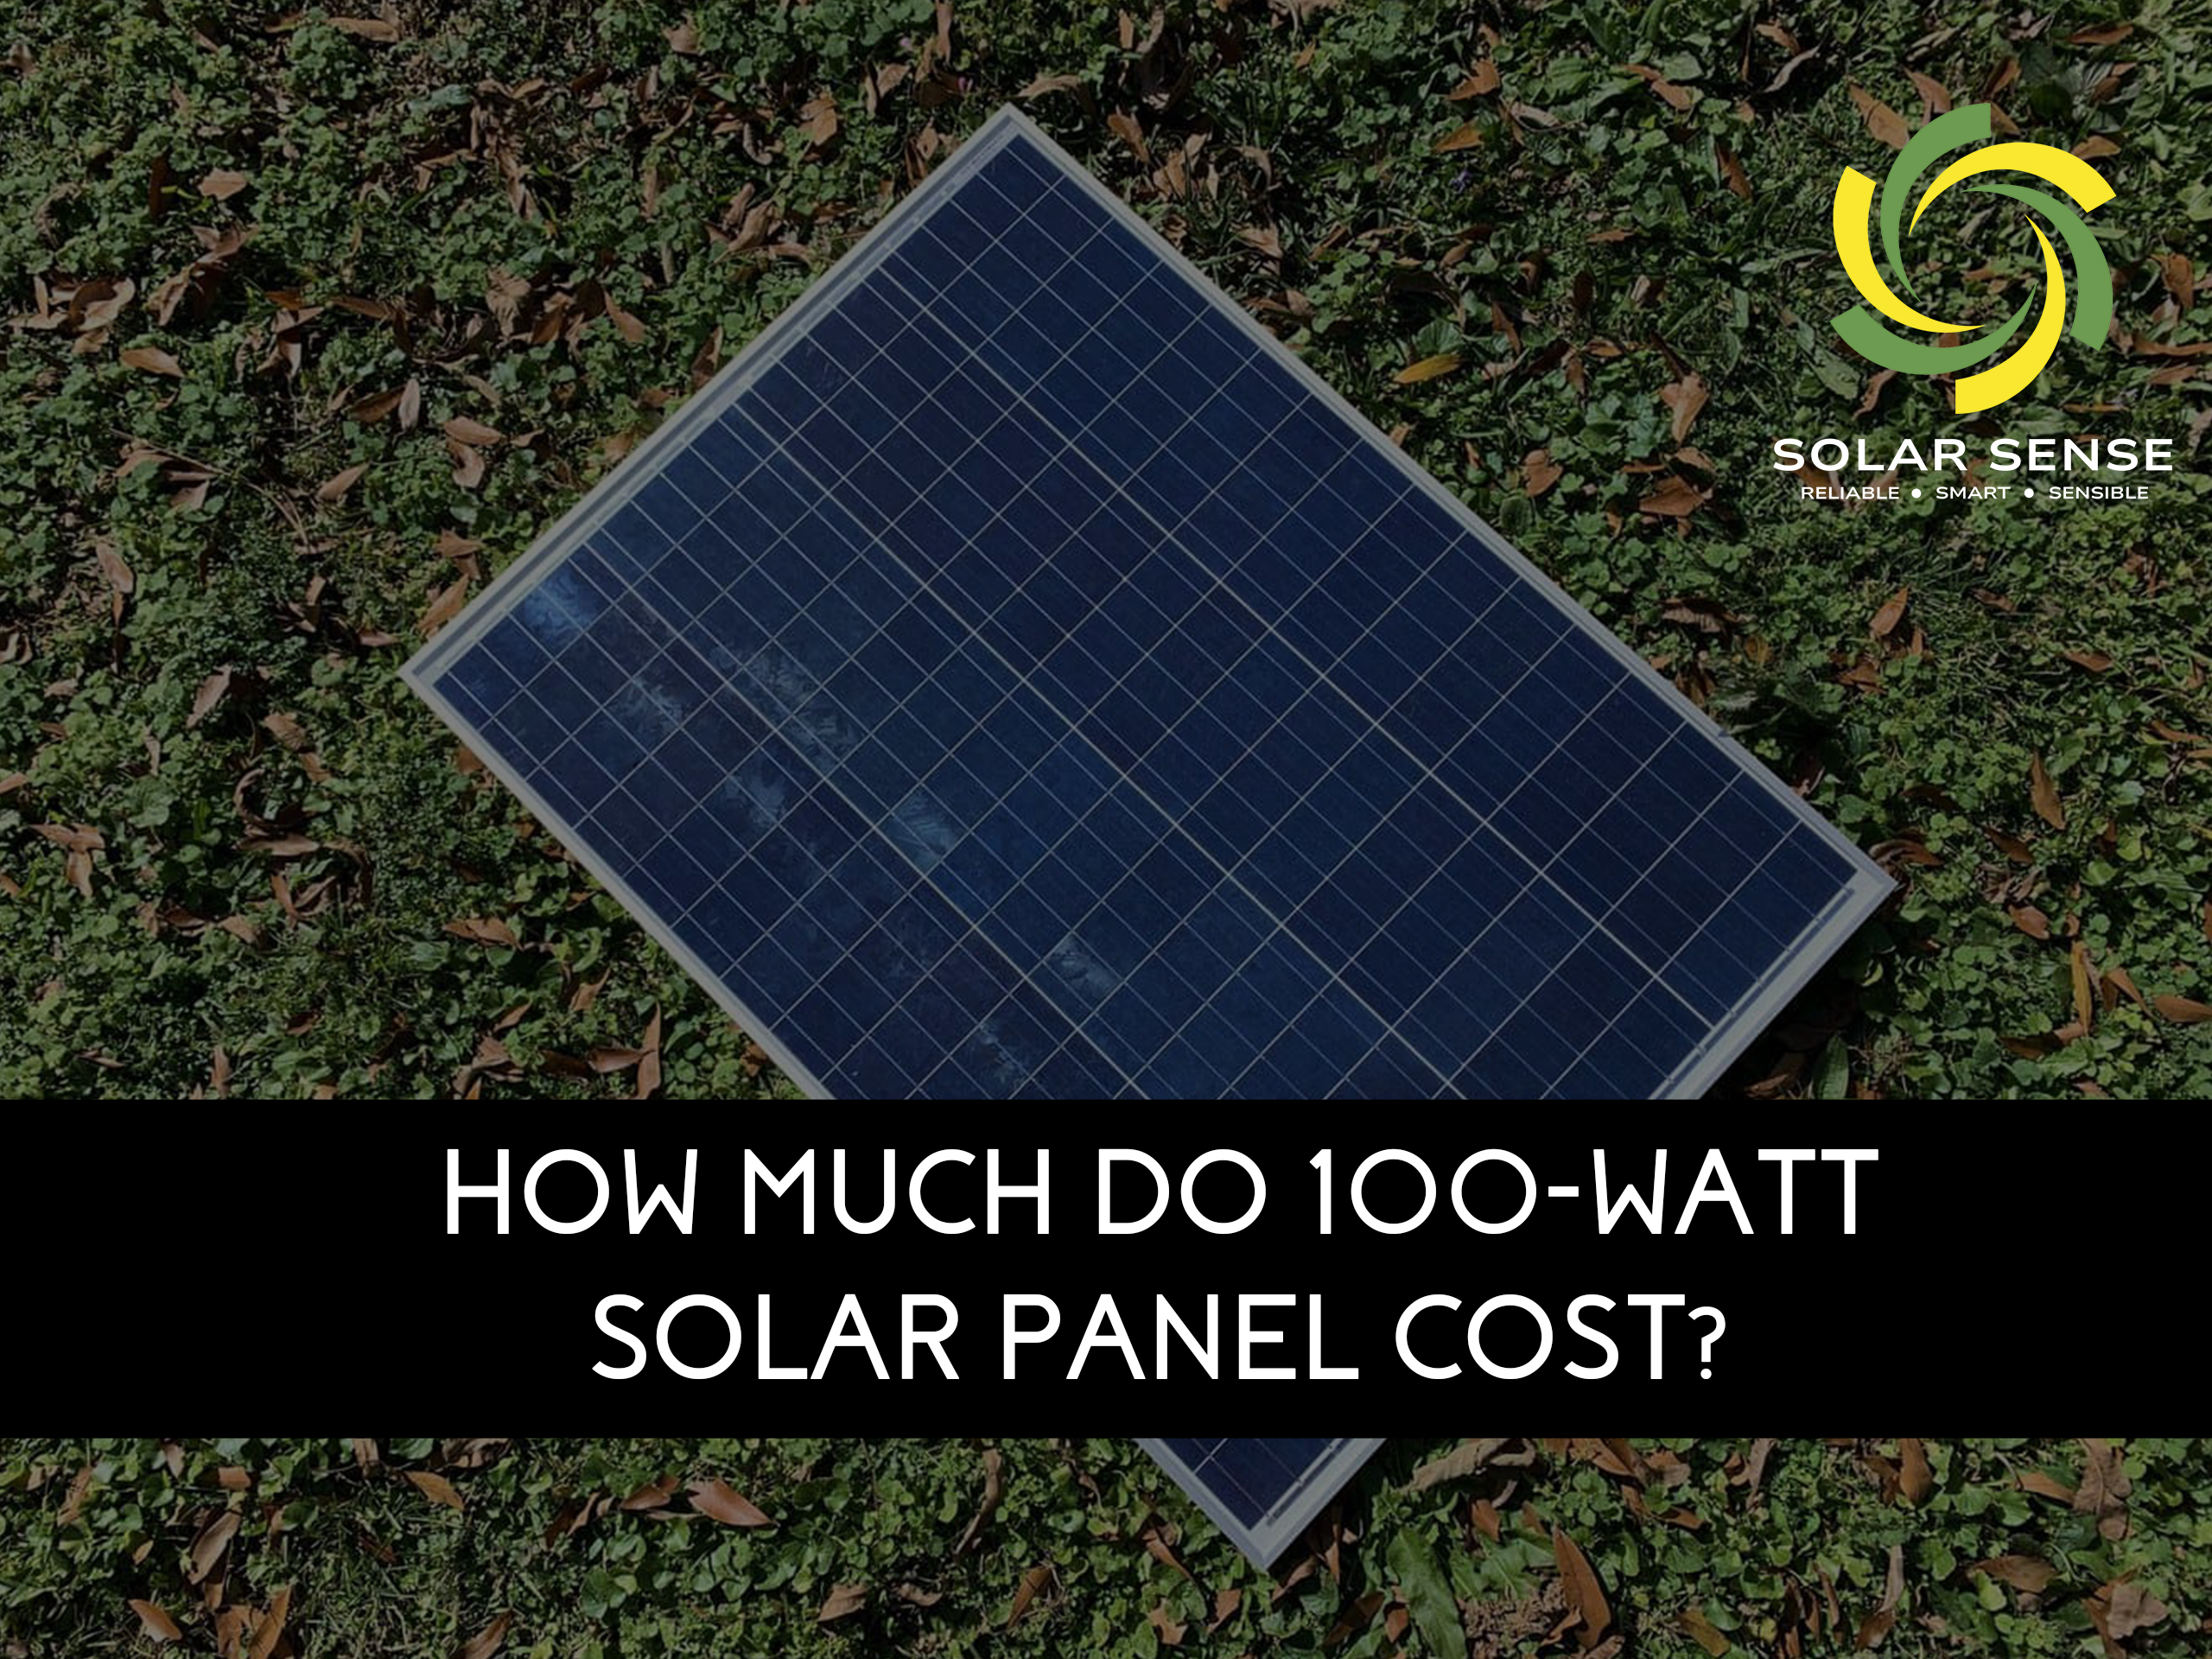
100 Watt solar photovoltaic panels are an economically viable small grid solution for generating solar power. They can generate up to 100 watts of tipped DC power under optimal weather conditions and can be permanently installed outdoors or made portable. Compared to heavier panels with higher wattage, 100-Watt panels are economical and lightweight, delivering power in the range of 300-600 watt hours per day from peak sun hours. Before buying these 100-Watt solar panels, it is advisable to look at their cost, factors affecting the cost, and protective deals. Homeowners and corporations alike seek solar panel systems as a well-disposed alternative energy solution for domestic installations.
What Do you understand by 100 Watt Solar Panel?
It is one of the best solar panels powered by A grade and high quality solar cells with ultra-clear tempered glass. In fact, it works well in places where the light and weather are poor. Which leads to the need for such renewable energy. This 100 Watt solar PV module features an IP 65 rated junction box on the front and is inexpensive for household purposes.
Almost all these boards are for use in small homes, small cabins, mobile homes, and off grid installations. They have a capacity of 100 W and can generate about 300-600 watt hours of solar energy in a day. Which is enough to power or recharge small electronic gadgets.
Price of 100 Watt Solar Panel
Capacity
MRP (Inclusive of all Taxes)
Discounted Price (Inclusive of all Taxes)
100Watt Solar Panel
Rs. 7000.00 to 9000.00
Rs. 3500 to 5000 (This price depends on various factors whether it is a solar panel brand, roof location or season etc.)
100-Watt Solar Panel Price and Specification
The price of a 100 Watt solar panel is an important consideration for those who want to showcase a budget solar component. There are three types of 100 Watt 12 volt solar panels available. Apart from monocrystalline solar panels, there are also polycrystalline solar panels that are efficient in producing electricity in a square foot area, though expensive. Although they are not very efficient, polycrystalline panels are low-cost, and use the sun’s energy efficiently during peak sun hours, and their efficiency decreases when the temperature is high. Bifacial panels provide the perfect solution for limited spaces. While maximizing energy production, offering almost double the output of conventional panels.
100-Watt panel type
Estimated Price range
Monocrystalline panels
₹3800 to ₹4300
Polycrystalline panels
₹3500 to ₹4000
Bifacial panels
₹4000 to ₹7000
Note: – The 100W 12V solar panels in India can vary by 6-12% depending on location, quantity, manufacturer, and installation needs.
Disadvantages and Limitations of 100-Watt Solar Panel
Since solar panels are sunlight dependent, their output will decrease, especially in winter or when it is cloudy.
Even though it is a one-time purchase, the average consumer can expect to recover the expense in 6-8 years.
Efficiency gains in between increase the need for more panels and raise the cost of each unit.
Installing 100-Watt solar panel modules may be impractical and expensive as there is not enough space on the roof.
Benefits and Key Features
A 100-Watt solar panel provides one of the most economical solutions to power a simple home or a small commercial unit. The electricity produced by your on-site solar panels offers great financial and environmental benefits.
Suitable for rooftops, balconies, and portable setups.
Powers various appliances and devices.
High efficiency, generating more power per square foot.
Affordable, providing 20-25 years of free electricity.
Performs well in low-light conditions.
Durable 2mm toughened textured glass protection.
Over 18% efficiency with 36/72 cell power ratings.
Reliable in diverse atmospheric conditions.
Working of a 100W Solar Panel
Elements of a 100W solar panel include photovoltaic silicon cells. Which convert sunlight into electrical energy by setting electrons in motion. This current moves through the current circuitry of the conductive plates and an electric inverter, designed primarily for solar power, converts the current into AC voltage. Which is useful for running appliances. Meanwhile, due to its rating of 100W 12V, the panel can be connected to the regional grid or used autonomously in remote areas.
Factors Affecting 100-Watt Solar Panel Costs
Panel Efficiency: High-efficiency panels offer increased power output and potentially offset initial costs over time. With lower costs per watt despite higher upfront costs.
Brand and Manufacturer: Brands with high quality and reliability may charge more, while longer warranties may offer added security.
Installation Costs: Labor costs for installation vary based on location, complexity, and experience. While permits and inspections also contribute to the overall installation cost.
Location: Solar irradiance in areas with higher power generation can lower long-term costs, with local regulations and incentives potentially influencing pricing.
Additional Components: The type and quality of inverters significantly influence overall costs. While the complexity of mounting systems also influences the final price.
Energy output of 100 Watt Solar panel
Estimating the power requirements is the first essential criterion that is required in deciding the wattage of the panel. As well as the number of panels required to generate the desired energy output. It is easy to find a 100 Watt 12 volt solar panel that is small in size and usable for small installations. As it does not take up much space unless you go for a large capacity system. Here is a rough estimate of the number of panels required to create different system sizes.
Solar system capacity
Estimated Energy Output (per month)
No. of 100-Watt solar panel needed
1 kW
120 units
10
2 kW
240 units
20
3 kW
360 units
30
5 kW
600 units
50
7.5 kW
900 units
75
10 kW
1200 units
100
Applications of a 100 Watt Solar Panel
A 100-Watt solar panel is a versatile and eco-friendly renewable energy source, ideal for off-grid situations. It can charge small electronics like smartphones, laptops, and cameras, making it suitable for outdoor adventures and remote locations. These panels are commonly used in RVs, boats, portable solar power kits, car batteries, emergency backup power, irrigation pumps, security cameras, lighting systems, and small off-grid systems like cabins, sheds, and greenhouses.
Subsidy Applicable for a Solar 100 Watt Panel
MNRE has a policy to provide subsidies to residents and societies who purchase and install solar power systems under its Rooftop Solar Subsidy Scheme. The subsidy amount is given on a per kilowatt basis of installed system capacity. To assess eligibility and avail financial assistance, visit the National Portal for Rooftop Solar and check the documents given under the Simplification Process tab.
The applicable subsidy for rooftop solar systems in India varies based on the system’s capacity and the type of installation. For individual residential installations, the subsidy is ₹30,000 for 1 kW, ₹60,000 for 2 kW, and ₹78,000 for systems of 3 kW and above. Resident Welfare Associations (RWA) and Group Housing Societies (GHS) can avail a ₹78,000 subsidy for common facilities up to 500 kWp. If they include individual rooftop plants for residents in their total capacity. The subsidy amount remains fixed for systems of 3 kW and above.
Get in Touch!
By taking the step to install solar panels, you are not only investing in your household, but also in a more sustainable future.
The growing demand for renewable energy, particularly solar power, is making it a viable option for businesses and industries to reduce their carbon footprint and energy costs, with a 500 kW solar plant installation being a popular choice. India’s businesses are increasingly turning to high-capacity solar systems to reduce their carbon footprint and cut energy costs. The 500 kW solar plants have become a popular choice, offering a balance of power and sustainability. Many private and government organizations in India have started sourcing electricity from solar energy due to their massive energy demands. In commercial and industrial areas, the load consumed is generally 500 kW.
A 500kW commercial solar system can help businesses achieve sustainability goals, eliminating over 12,000 tonnes of CO2 emissions. The financial case for these systems is compelling, as the cost of energy can be less than 3c per kWh. The solar industry is recognizing the potential benefits of solar energy for its sustainability and cost-effectiveness.
What is a 500 kW Solar Plant?
A 500 kW solar power plant refers to a photovoltaic (PV) system that can generate up to 500 kilowatts (kW) of power per hour under optimal conditions. These systems are usually used for commercial and industrial purposes and are capable of providing substantial energy savings over time. A plant of this size can cover the electricity needs of a small to medium-sized factory, an office complex, or a large agricultural facility.
Advantages of Solar Energy for Modern Businesses
Offers long-term financial benefits by reducing electricity bills.
Acts as fixed-cost assets for businesses and buffers against tariff hikes.
Requires minimal maintenance except for regular cleaning.
Promoted by incentives and subsidies.
Reduces grid reliance and allows potential power sales.
Average lifespan: 25-30 years.
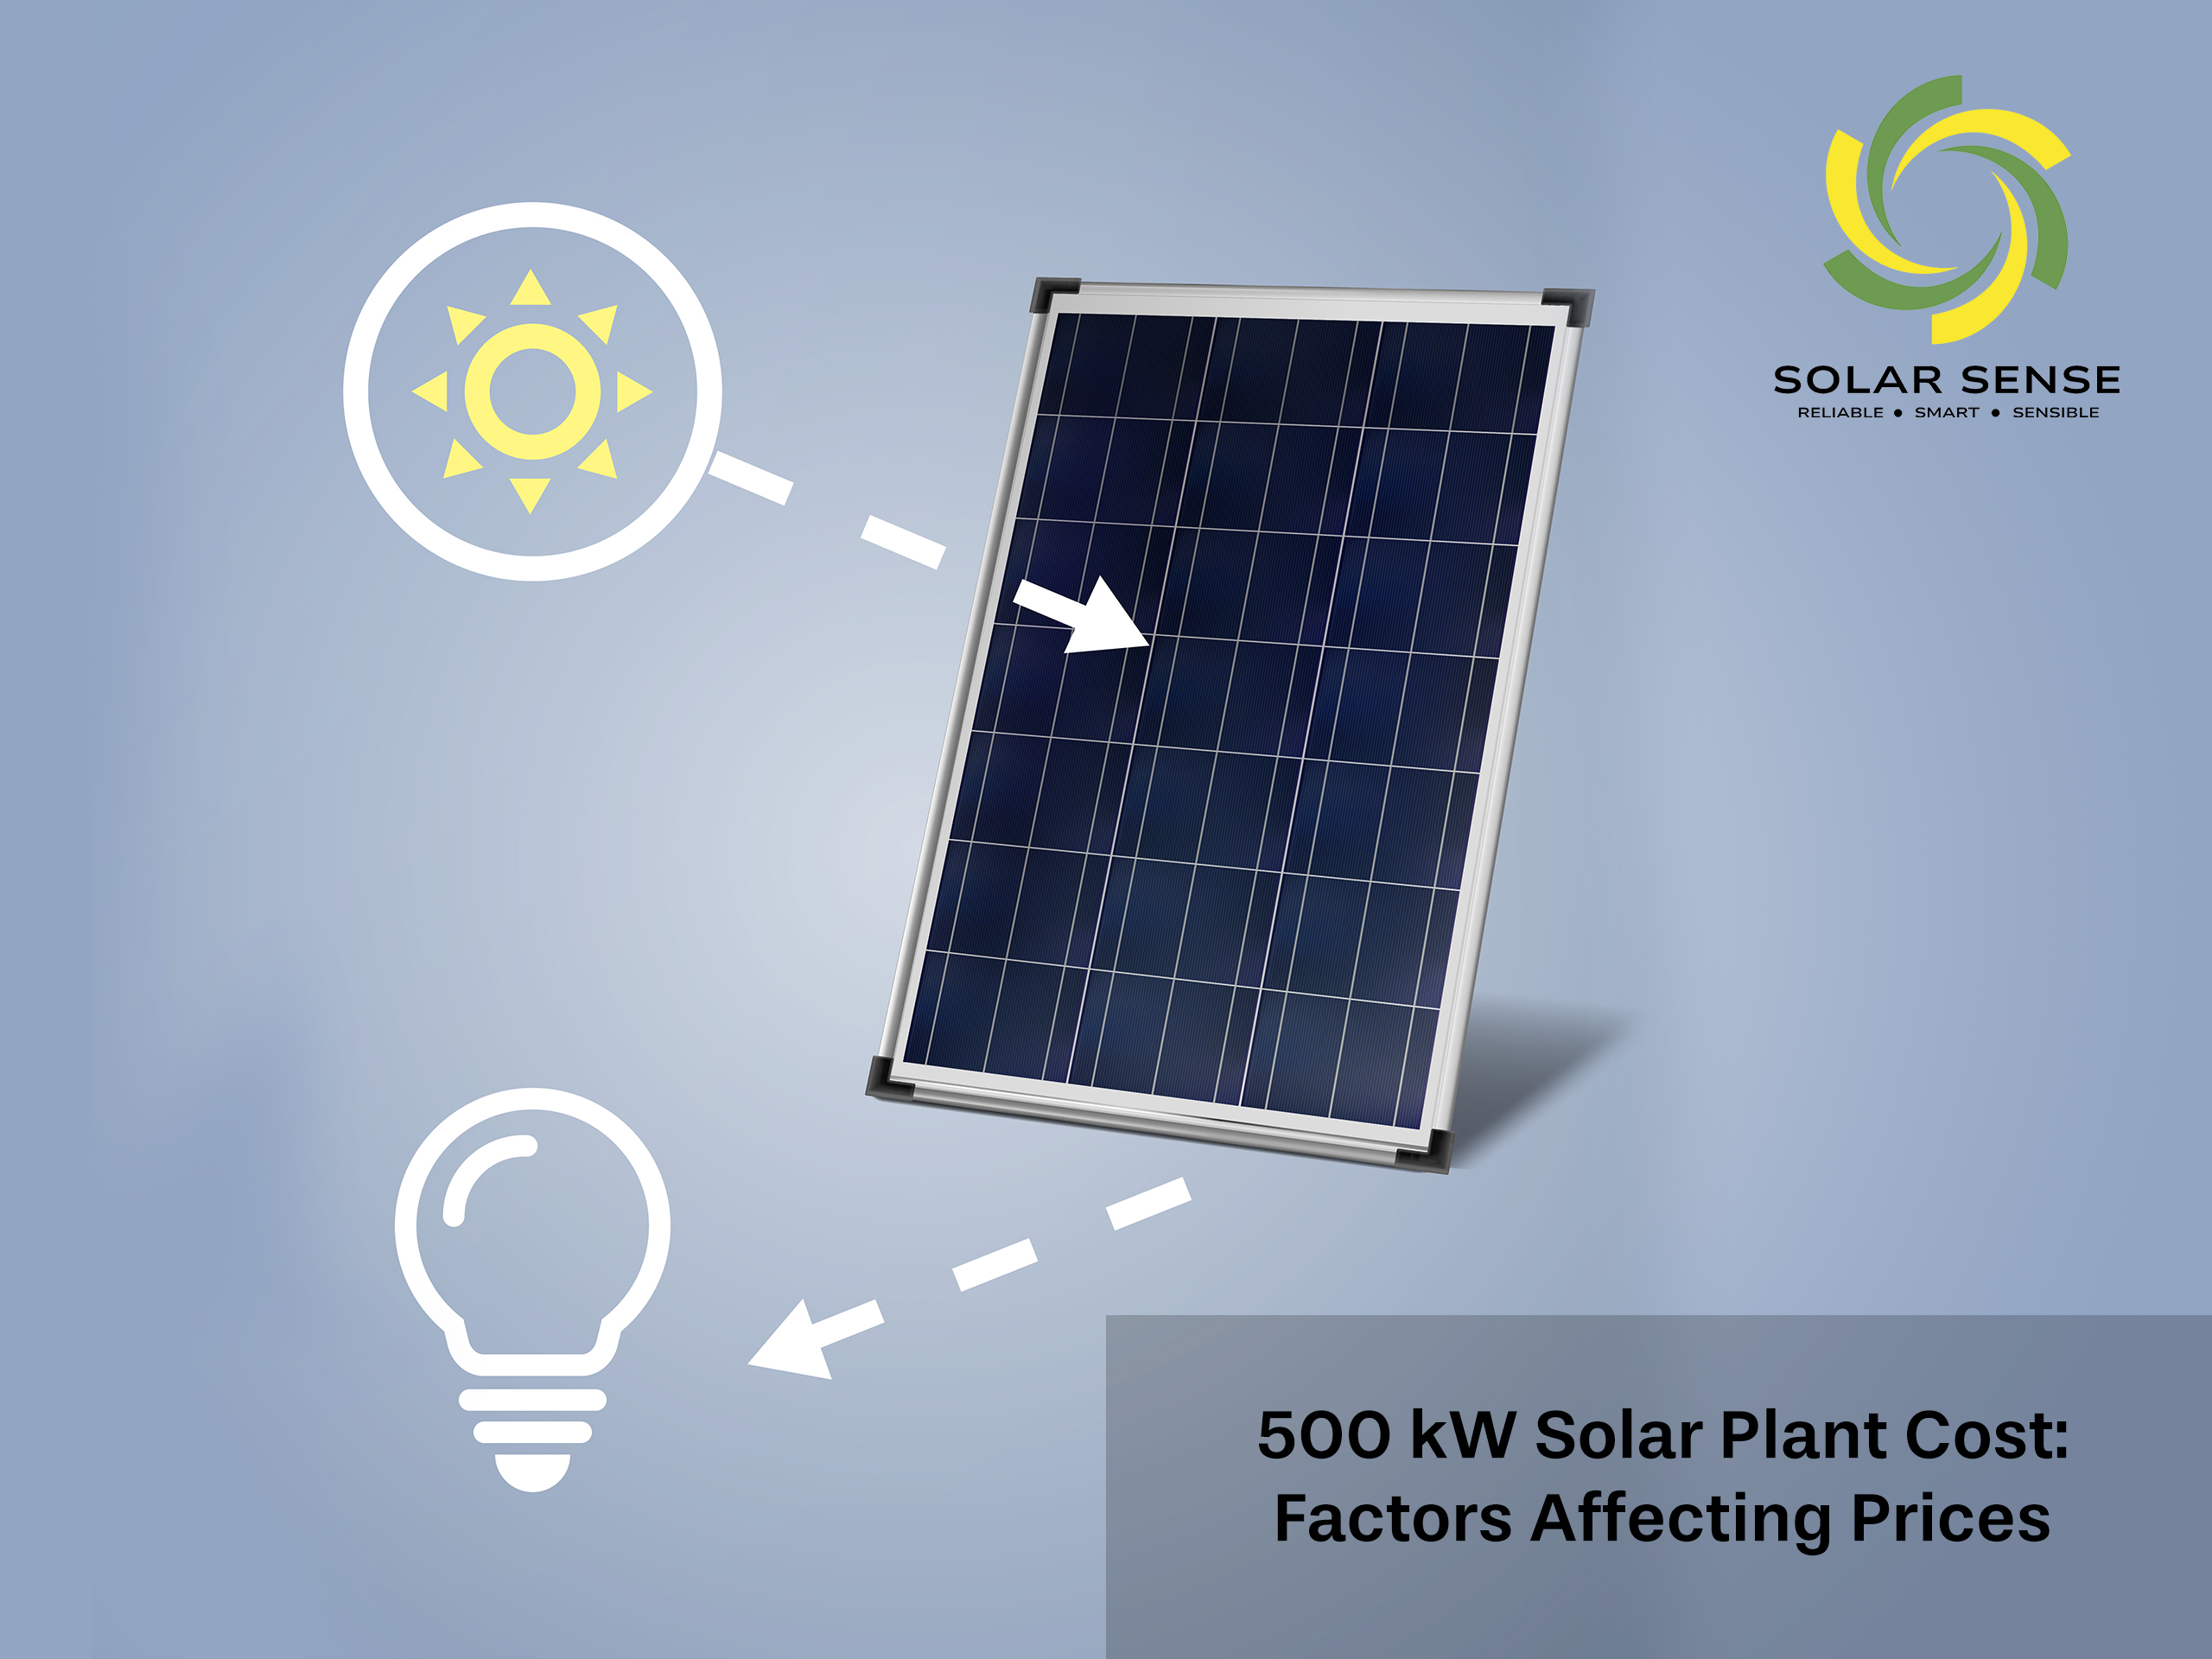
Factors Affecting the Cost of a 500 kW Solar Plant
Types of Solar Panels
Location
Land Requirements
System Components
Installation Costs
Government Incentives
Maintenance and Operational Costs
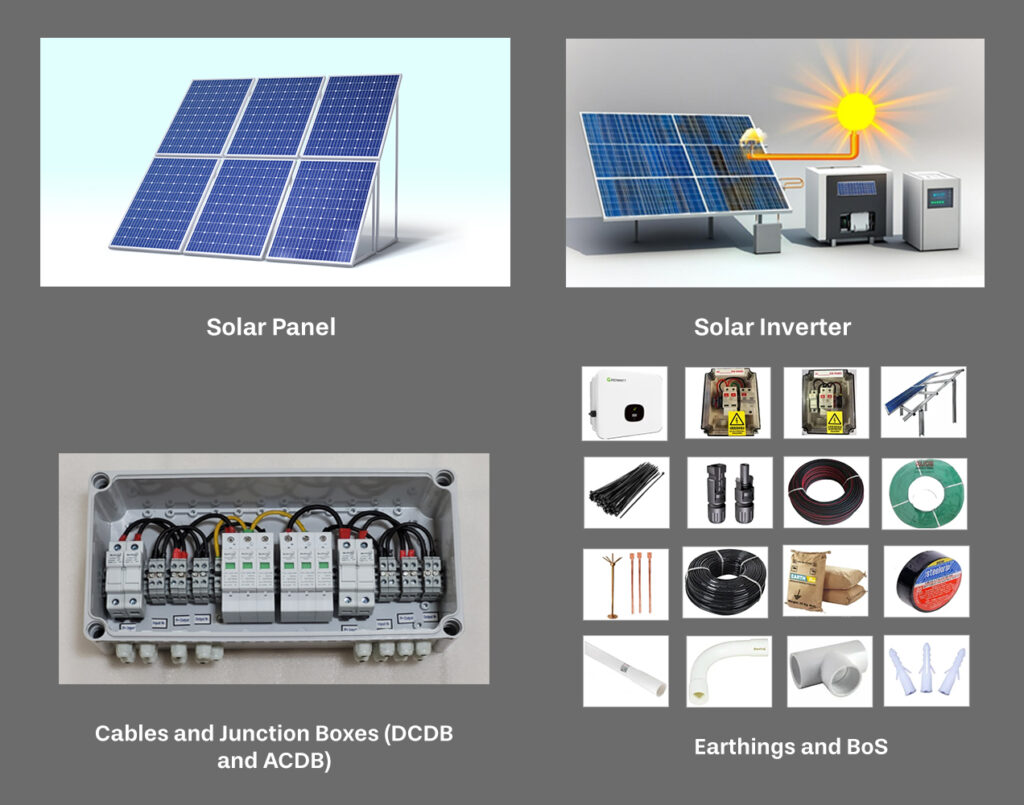
Component of 500 kW Solar Power Plant
Solar Panels: Solar PV panels are crucial for rooftop solar systems, with warranties of 25 years and 30 years. Our popular partner brand include WAREE, TATA, ADANI etc.
Solar Inverters: Solar inverters convert DC power into AC running loads.
Cables and Junction Boxes (DCDB and ACDB): Junction boxes and cables are crucial components in a solar plant, monitoring and isolating the inverter in case of fault. DCDB and ACDB monitor the output and load. Cables are DC and AC, with DC cables connecting panels to DCDB and AC cables connecting output to loads
Earthings and BoS: Solar plants are earthed for AC and DC sides, with a 20mm diameter copper bonded electrode being the recommended choice. Balance of the system comprehensively covers hardware and operational processes.
500 kW Solar Plant Cost
The price of a 500 kW solar plant system in India usually ranges between ₹3 crore to ₹5 crore. This cost is influenced by factors such as the type, brand, quality, power rating, plant location, and roof orientation. The average cost is around ₹45-50/watt, with a 500kW system costing around ₹2.25 crores. The cost of the system can be divided into solar panels, inverter and other equipment, installation, land acquisition, and permits and administrative costs.
Solar panels account for 50-60% of the total cost, with monocrystalline and polycrystalline panels accounting for 50-60%. Inverters, mounting structures, cabling, and other essential components can add 15-20%, with costs ranging from ₹45 lakh to ₹1 crore. Installation costs, including labor, engineering, and design, can add 10-15%. Land acquisition, if necessary, can add 5-10%, with costs ranging from ₹15 lakh to ₹50 lakh depending on the location.
Area Required for 500kW solar plant system
A 1 kW rooftop solar system requires 100-130 square feet of shadow-free area, while a 500 kW system requires 50,000-65,000 square feet. Ground-mounted systems require 2.5 acres or more. Integrated solar roofs like Ornate InRoof reduce footprint by 26 percent.
Energy Generation of a 500kW system
A 500 kW solar system can generate approximately 2,000 to 2,500 kilowatt-hours (kWh) of electricity per day under ideal conditions. This translates to an annual production of roughly 750,000 to 900,000 kWh. However, actual output can vary based on factors such as panel quality, roof orientation, location, maintenance, and shading. Despite these variables, a 500 kW solar system can still significantly reduce reliance on traditional energy sources and cut carbon emissions by 700 to 900 tons per year.
Note: These figures are estimates and can vary based on specific circumstances. It’s best to consult a solar energy specialist who will be able to provide a more accurate forecast for your particular area.
Get in Touch!
By taking the step to install solar panels, you are not only investing in your household, but also in a more sustainable future.
Solar panel stands are of great importance in enhancing the performance of solar power systems. As they enhance the performance of solar power systems by capturing more sunlight and generating more energy. Solar Sense offers a wide range of stands that can help improve the performance of solar panels.
The correct installation structure must be used if the installation process is to be successful and this structure must hold the panels firmly at the correct angle so as to capture as much sunlight as possible and also increase the output. This article explains in detail about the various solar panel stands including their advantages, mounting systems, rooftop mounting options, brands and reviews. These factors are crucial for choosing the right solar panel stand to maximize solar energy generation.
Why are solar panel stands important?
Solar panel stands play a crucial role in any solar power system and use robust materials like aluminum or hot-dipped galvanized steel. The purpose of these stands is to hold solar panels correctly in place and endure all types of climatic conditions for many years. By raising the energy collectors above the ground, you can set the panels at a more suitable tilt angle. This increases their exposure to sunlight and enhances conversion efficiency.
Maximum use of sunlight: When you set solar panels in the right position, they follow the movement of the sun and collect a greater amount of solar energy. The stand also provides the panels with adequate tilt degrees that enable them to absorb as much solar energy as possible.
Maintaining panel support: Stands play an essential role in maintaining the orientation of solar panels. This helps them to prevent damage that impacts their physical properties. This stability allows for a longer physical working life of the panels. You reduce the chances of panels being damaged by wind, snow, and other adverse conditions.
Ultimate impact on energy production and reliability: Strong and well-designed stands not only enhance energy production by allowing proper panel orientation but also increase the life of the panels by protecting them from excessive wear. This contributes to increasing the performance of the system and aids in smoothening energy production during its period of use.
Types of solar panel stands or mounting structure
You should not install the structure or stand for the solar panel haphazardly, as it affects the performance of the solar system. Galvanized iron stands perform well because they use strong material. While many people focus on buying solar panels, you should give equal attention to the stands, as the performance of the entire system depends on them.
There are several types of solar panel stands:
Rack mounting system: wall-mounted support structure.
Pole mounting system: freestand mounted on a pole or post.
Adjustable mounting system: angles can be created for maximum sunlight.
Choosing the ideal stand guarantees maximum energy production, proper efficiency and the longest possible lifespan. Such a structure must also be strong enough to withstand moderate winds, hail, rain, snow and even mild earthquakes.
Best Types of solar panel stands or mounting Structure
1. Rack Mounting Systems
Rack mounting systems are the most commonly used solar panel mounting solution. Most involve a long metal structure that is mounted on the roof of a building, providing surface area to place solar panels on it. The design of rack mounting systems makes them relatively simple to install compared to other types of mounting solutions.
Advantages:
Mounting systems for solar panels make installation easier by providing secure support for proper alignment. It is versatile enough to be used with a variety of roof types and panel configurations, making it commercially viable. It is also cheaper than most customized mounting systems.
Disadvantages:
For those who prefer a sleek and clean design, metal frames may not be the best choice as they tend to be more conspicuous. They can rust, especially in bad weather, and you need to screw them into the roof, which poses a potential leak risk if you do not seal them properly.
2. Pole mounting systems
You use pole mounting systems in solar installations where the building structure cannot support the weight of the solar array, as well as in locations prone to strong winds or high gravity conditions, such as snowfall. Although cheaper designs are often adopted, pole mounting offers good possibilities for arranging solar panels close to street lamps, fences, borehole pumps, antennas, or mobile towers where other mounting arrangements might not work well.
Advantages:
Photovoltaic panels are adaptable and can be mounted on steep seam roofs that cannot bear their weight or on roof slopes where traditional mounting structures would not be suitable. They enable panels to be placed higher to minimise shading and allow more sunlight onto the panels. The panels also provide better ventilation, which aids cooling and improves system performance. Unlike traditional roof mounted systems, these are also accessible for cleaning and servicing. They can also be placed in many other areas such as between streetlights, fences, borehole pumps, antennae or mobile towers. Such systems provide better efficiency even in harsh weather conditions.
Disadvantages:
Generally, you construct elevated systems with more materials and infrastructure than sitting-rack mounting systems. Their visual impact may be more noticeable, and they may require a specifically designated area for the pole. They may also be more susceptible to damage or interference. The process of installation can be quite complex and may require technical expertise. They are easy to obtain, although they may present some problems with maintenance due to their elevated position.
3. Adjustable Mounting Systems
Movable mounting systems provide a means by which the angle of solar panels can be changed to ensure that efficiency is maximized under changing sunlight conditions. They are primarily suitable for areas where sunlight varies or properties where certain angles are required to harness the maximum possible solar energy. However, they are usually more expensive than racks or pole mounting systems.
Advantages:
The system of adjusting panel angles improves energy production by maximizing sunlight. It is flexible, allowing it to be used in areas with varying levels of sunlight or specific panel angles. This advanced system can increase energy production from a geographic location compared to fixed systems used in seasonal changes. It can be adapted to most locations and sun paths, improving efficiency in a variety of settings. This fine tuning results in efficient production of energy and improved performance of the entire system.
Disadvantages:
Movable or pole cellar systems cost more than fixed systems because they require additional complexity and components to produce. They are also more maintenance intensive, require frequent adjustments, and installation can be quite tedious and may require experts to install them. Any object or mechanism that has moving components will experience wear and tear and, thus, may fail mechanically. And also, they may use more space and are more likely to harm the aesthetics of the installation area.
4. Ground Mounting Systems
You install ground-mounted solar panels at an angle on a metal frame that supports them from the ground. They are suitable for solar power plants, as well as for farms, industry and commercial applications.
If you need more roof space or an area free of trees, this is the best solution for you. However, you should install ground-mounted systems in a clean, safe, and sturdy place because they can become contaminated by vandalism, dirt, leaves, or snow.
Advantages
The system provides possibilities for higher generation, has greater capacity, does not require any house modifications and it is simpler to install tracking systems.
Disadvantages
The storage system is expensive, requires a shadow-free area, and is prone to vandalism and dirt accumulation underneath the panels.
5. Rooftop Mounting Systems
You can mount rooftop solar stands, also called roof racks for solar panels, on roofs to provide a sturdy and compact base for the solar panels. They are inexpensive as the material is cheap and reduces the amount of wiring by reducing the distance between the inverter and the solar array and hence reducing DC losses.
People commonly use this structure in residential and commercial areas, especially where extra roof space is available. As a downside, they penetrate the roof and if not sealed properly, this can cause some leakage problems. They are also dependent on the roof orientation, angle, shading, etc. which can reduce their efficiency. You can also use tilting system structures, such as solar trackers, for roof mounts.
Advantages:
Low installation cost, ease of maintenance, energy production from otherwise wasted roof area and protection of the roof below.
Disadvantages:
This system requires inclined installation through the roof and proper shade control and at the same time proper space, although there is difficulty in providing these features on a large scale.
6. Carport Mounting Systems
Solar carport mounting structure is a structure that facilitates fixing solar panels to the shade structure of a carport or parking lot to reduce heat and collect solar energy. The system features a supporting frame structure made of rigid aluminum and galvanized steel that you can adjust to fit various solar panel dimensions and combinations. Carports resemble ground-mounted solar structures, but you install them at a higher level to provide parking space underneath. They sometimes include integrated EV charging points and can serve both residential and commercial purposes. These structures enhance the design of the space and are suitable for domestic and business applications.
Advantages:
Sustainable, energy productive as well as cooling, this system makes optimum use of underutilised areas to produce energy and provide shade.
Disadvantages:
Requires shadow-free land space to set up.
7. Shed Mounting Structures
Shed mounting structures are similar to rooftop solar installations. You convert these structures into metal sheds or sheet roofs instead of concrete roofs. You regularly install them in places like factories, warehouses, and cafeterias to produce clean energy and reduce energy expenditure.
Advantages:
This system has low installation costs, inexpensive maintenance, and utilizes bare rooftops to produce energy.
Disadvantages:
Power output is higher in the middle turbines but requires the installation of shadow reduction panels in the roof top area.
8. Tracking System Mounting Structures
Racks fitted with tracking platforms for solar tracking and solar water pumping systems are self-adjusting devices that help orient the panels to the sun at the best angle. In areas with high temperatures, they are particularly useful. “There are two types: single axis trackers track the inclination of the sun while two axis trackers follow the inclination and rotation of the sun, these often include PV concentrators. They improve efficiency and help reduce labor, but solar trackers are rare because of their cost and mechanical failures.
Advantages:
This system increases efficiency by concentrating production during peak periods, optimizing spatial capacity, and preventing shading.
Disadvantages:
The installation process is complex and expensive, so rehabilitation is difficult.
Why should you use the best solar panel stand?
A poorly designed structure that shakes in high winds can warp the insides of solar panels, causing microscopic cracks in the silicon. Such cracks often lead to less power and cause the system to malfunction.
Electricity is one of the most frequent items in our monthly bills, yet the process of calculating it is difficult for many. In India, the State Electricity Regulatory Commissions determine the cost of electricity to be charged, and customers do not face much hassle in the billing process. This is why knowing the factors that affect these bills is important to control usage and costs incurred. In this blog, we’ll address the question, “How do I calculate electricity usage?” We will examine all the tools and steps that are necessary to determine electricity consumption accurately. By the end, you will understand the amount of electricity you use and how it will impact your total bill.
Understanding Electricity Usage
Electrical appliances and devices in homes or businesses consume energy, which defines electricity usage. Most of the time, it comes in under kilowatt hours. A 1000-watt electrical appliance consumes energy over a period of 1 hour.
Learn about Units of Electricity
Power rating (watts): This indicates the amount of power consumed by any appliance. One watt is equal to the energy used by a small bulb.
Kilowatt (kW): There are 1000 watts in 1 kilowatt. People generally use it where the load is high, such as with air conditioners.
Kilowatt-Hours (kWh): Calculates energy consumption over a period of time. For example, using a 1 kW appliance for 1 hour consumes 1kWh of energy. Electricity tariffs are generally on a kWh basis.
BTU: Measures heat. Raising the temperature of 1 pound of water by 1°F requires energy.
BTU/h: Represents how much heat an appliance can move per hour. For example, an air conditioner with 12,000 BTU/h can cool a room effectively.
Horsepower (hp): Used to measure the power of engines or motors. One horsepower equals about 746 watts.
Ton: For refrigeration, melting 2,000 pounds of ice in 24 hours requires one ton of heat. It’s about 3,517 watts or 12,000 BTU/h.
Amount of energy used by common appliances
The table below shows the approximate energy requirements of various appliances (these values can vary considerably depending on the appliance). It is worth noting that the requirements given on the packaging of an appliance are most often about the maximum energy requirements of the appliance.
The stated energy consumption is very unlikely to be the energy consumed. When such an appliance is used by an average user.
This is why you cannot simply calculate it as a power requirement x time. When considering power consumption, it is often necessary to know the general wattage of household gadgets. Air conditioners, depending on the type, can be in the range of 1500 or ideally 10000 watts. With window type units having a capacity of between 1500 and 5000 watts. Home heaters have a higher capacity, while portable-device type gas water heaters have a capacity of 12,000- 20,000 watts. While portable ones draw power in the range of 750 to 2000 watts.
The HZ range is 25 to 350 watts and above that are humidifiers which have a HZ electrical power rating of a maximum of 750 watts. Normal fans, whether ceiling or table, operate at a lower power range of 15 watts to 200 watts. These appliances vary in the intensity of household power consumption, most LED bulbs use a power consumption rate between 3 and 25 watts. On the other hand, incandescent bulbs use between 15 to 200 watts. Last but not least the power of electric water heaters varies from 3000 watts to 6600 watts. Being familiar with these watts will help you know how to calculate the power usage of different household appliances in your homes.
Refrigerator: 500-1000
Electric range/oven: 2000-5000
Electric cooktop/stove: 750-5000
Microwave oven: 750-1500
Dishwasher: 1200-2000
Coffee maker: 600-1200
Toaster: 750-1500
Electric kettle: 1000-2000
Electric cooker: 160-1500
Tools Needed for Calculating Electricity Usage
Electricity meter: An electricity meter is a device that measures the amount of electricity consumed in a premises over a given period of time. It records the unit or amount of electricity used in kilowatt-hours (kWh). The meter is usually read within a certain time frame to keep a record of bills and usage.
Calculator: You will find many calculators on the Internet that can help in doing such calculations and provide an estimate of electricity consumption based on some inputs. Such tools often ask you to fill in the wattage of your appliances and how many hours they are in use. For example, utility websites usually have power consumption calculators or energy saving apps.
How to Calculate:
To convert an appliance’s wattage to kilowatt-hours (kWh), multiply its wattage by the number of hours it is used and divide by 1,000. For instance, a 100-watt light bulb’s daily usage is (100 W x 5 hours) / 1,000 = 0.5 kWh.
How to Calculate Electricity Usage
To estimate the amount of electricity you use, you must first break down the power rating of your appliances. Which can often be found written on the appliance’s body or in the user manual, in watts (W). For example, if the microwave’s power is a thousand watts, then use this as the base value this time. Then find the daily usage hours for all of these appliances. For example, you may use the microwave for 30 minutes a day, in which case it is 0.5 hours.
Multiply the item’s active power with its duration of operation to calculate the energy used in watt-hours. In this example, for the microwave, it would be 1,000 watts times 0.5 hours which leads to 500 watt hours. Divide the answer obtained in watt hours by 1000 to convert this amount in watt hours to kilowatt hours. Which is a common unit for electricity consumption. So 500 watts per hour, and dividing by 1000 gives 0.5 kilowatt hours.
For example, in a practical situation if you have a light bulb with a rating of 100 watts and you use it for 5 hours a day, first get a watt hour energy consumption by calculating the watt rating from 100 to 5, which gives 500 watt hours. To convert this to kilowatt hours, you divide by 1000, which results in 0.5 kilowatt hours. Therefore, this tells you that the light bulb in question consumes 0.5 kilowatt hours of electricity in a day. By following these steps, you can find out how much electricity the appliance in your home uses, allowing you to better control your energy usage.
How Electricity bills are calculated in India and how can you calculate electricity usage?
Meter Reading: This component includes the average unpaid electricity consumption over the month. Your electricity company’s meter reader will record how much electricity you have used since the last reading. We measure it in kilowatt-hours (kWh). You can check the reading on your meter and calculate the cost charged at that time.
Tariff Rates: The State Electricity Regulatory Commission determines the generation and distribution cost of electricity, which governs tariff rates. The rates usually vary on the type of consumer such as residential and commercial.
Calculate Energy Consumption: To know how much electricity you have consumed, subtract the previous internal meter reading from the current internal meter reading. Multiply the number of units of electricity on the rooftops by the energy cost to determine the electrical energy cost. For example, if the previous reading was 1,000 kWh and the current reading is 1,200 kWh, the usage would be 200. Let’s say the rate is Rs 5 per kWh, it means your total cost would be Rs 1,000 (200 x 5).
Fixed charges: Also, some DISCOMs charge you a fixed amount every month, irrespective of the amount of energy consumed during that period. This charge can also change depending on the category of consumers and the type of connection given to the consumer (single-phase or three-phase).
There are some other charges for each service, which have to be paid apart from the fees discussed above. Some such charges include taxes like GST (5%) on the bill, meter rental charges, and electricity duty.
Energy saving tips: How do I calculate electricity usage?
Keep a track of how you use energy: Prevent wastage of electricity such as leaving lights and appliances on unnecessarily, use standing fans instead of using AC, increase the number of clothes and wash fewer clothes instead of using heaters.
LED bulbs are a great replacement for incandescent light bulbs: LEDs are cheaper in the long run and consume less power.
Installing a programmable thermostat: A thermostat that can be programmed to eliminate instances where people do not use their heating and then turn the thermostat up can lead to huge savings.
While shopping for appliances, keep in mind their energy efficiency: Keep in mind that you should purchase appliances after considering their cost.
Check the windows: Efficient energy saving windows help reduce heat dissipation into the atmosphere, hence requiring less energy. Install curtains, blinds or any barriers in the windows to reduce exposure to sunlight for better cooling costs.
Insulate your home: Energy bills for heating and cooling will be lower when parts of the home are carefully insulated.
Common Mistakes to Avoid
Incorrect Meter Reading
The biggest problem when estimating home electricity consumption is misreading the meter. To properly apply the estimate, it is always best to read the meter correctly. If you follow the arrows on the meter, record the numbers that appear on the meter at the same time every month. Also, if you are taking meter readings yourself, you will need to pay attention to the counter with a circular dial or electronic meter and read them correctly. If there is a mistake or any of the hills are incomplete, call the company and find out if the place is good.
Overestimating Usage
Another common problem is the tendency to overestimate electricity consumption. Make a clear distinction between what you say about consumption and what is consumed. Ensure you use actual meter readings and appliance metrics when making these estimates, rather than relying on guesswork or estimations. This helps people avoid unnecessary panic over high bills or the impulse to adopt energy-saving measures when not needed. Creating a habit of looking back at your considered metabolism of energy and knowing the reasons why any changes have occurred will greatly improve your strategy.
Installing small solar panels can improve the exterior of your home, business, and even shops. Which in turn reduces your carbon usage and energy expenditure. As solar energy becomes a trend, people are installing small solar panels on residential homes, street stores, and even on the streets. Such panels also work best for home improvement projects and classroom chores. This makes them quite functional and eco-friendly. Mini solar panels are a good way to ensure that you also make the world greener while benefiting from energy savings.
What Are Small Solar Panels?
Small solar panels typically range in size from 0.6 x 2.55 inches to 8.85 x 5.12 inches. Smaller residential and commercial panels are larger in size than these panels. These panels are smaller than the larger residential and commercial panels. These small panels produce a lower power output range, almost always between 0.06 and 4 watts. These types of small panels are ideal for low power applications. Small solar panels fit well in small spaces such as homes, street shops and portable devices. This adaptability has made it popular as part of a DIY project, science project or simply off the grid.
Features of mini solar panels?
Provides stable voltage, although the current varies when exposed to sunlight, ensuring reliable performance for small-scale applications.
Typically produces between 0.06 and 4 watts, making them perfect for low-power use like small gadgets and off-grid systems.
Ranges from 0.6 x 2.55 inches to 8.85 x 5.12 inches, to fit into tight spaces and seamlessly integrate into various setups.
These are two different types which are monocrystalline and polycrystalline. Monocrystalline offers high efficiency and durability, while polycrystalline is more affordable and slightly less efficient and is more budget-friendly.
Built to withstand outdoor conditions, with many weather-resistant materials and designs.
Suitable for many applications including DIY projects, remote power solutions, and educational purposes.
Practical use of Small Solar panels?
Small solar panels have many practical applications as they are multifunctional. Such panels are generally installed in standalone lighting systems at home, such as outdoor and garden lights. School projects also work well with small solar panels as students can engage in practical activities aimed at harnessing renewable energy. These are used to power street lamps and traffic lights using renewable energy sources for public safety. These panels also help charge various devices and power bulbs when you go camping outdoors. Apart from this, small solar panels can be found in solar panel cleaning robots, solar fences, street shops and such things which make their practicality and benefits in everyday life even more evident.
Applications of Small Solar Panels?
Powering Low-Energy Devices: Everything from calculators to radios and watches can be run on small solar panels with devices requiring little energy. This is because the size of the devices as well as their energy conversion efficiency is best suited for such devices.
Charging Mobile Devices and Laptops: By using batteries, small solar panels are also able to provide enough power to charge a mobile phone or laptop. This makes them suitable for backup power in remote areas and during outdoor activities.
Off-Grid Systems: These modules are suitable for off-grid use, where they include RVs, boats and remote transmitters. They allow energy provision in places where there are no conventional energy sources and thus improve comfort and self-sufficiency.
Industrial Applications: The use of mini solar panels extends into industrial spaces including various areas. These are areas classified as hazardous as there are present flammable gases or vapors and the design of the panels has to be such that the panels work optimally and safely under these conditions.
Advantages of Opting for mini Solar Panels?
Affordable for low-power applications.
Ideal for residential, commercial, and portable use.
Lightweight and easy to transport.
Eco-friendly, reducing carbon footprint.
Requires minimal upkeep for hassle-free energy needs.
Why Are Small Solar Panels Gaining Popularity?
Small solar panels are now everywhere due to their scope of use and effectiveness. They provide affordable options for sites with limited space or low energy requirements, so they are an ideal choice for small appliances, outdoor activity equipment, off grid power systems, and other such applications. Both today’s commercial establishments and domestic households are adopting the use of green energy in daily life activities without relying on large structures on location. Their lightweightness and operation by anyone makes them applicable to distant locations as well as temporary locations. Small solar panels highlight the transformation of energy sources from energy inefficient to more environmentally friendly, exemplifying the overall trend toward power efficiency and green technologies.
Get in touch with Azadpur
Ready to make the switch to Solar Panels? Contact us for a consultation to find out how we can help you in selecting the best solar panels for homes in india and utilize the power of the sun.
The significance of energy efficiency and renewable energy sources, including solar panels, has become increasingly significant in today’s world. Solar panel systems are a cost-effective and efficient method of generating electricity for homes and other facilities using solar energy. One thing that is important to know from this article is that the many types of solar panels available in the market make it a challenge for any individual to decide which type is ideal for his installation. Monocrystalline AC solar panel are a top choice for homeowners due to their superior performance and versatility. This blog discusses the benefits of monocrystalline AC solar panels, which experts consider the most efficient and best-suited solar panels for home use.
What are Monocrystalline Solar Panels?
Monocrystalline started with the technology in the 1950s. They are a high-efficiency solar power generation method produced through single Si crystal formation. These are more efficient at converting solar energy into electricity per square meter of area but are expensive. They are made from high-purity mono (single) silicon crystals. They take up less space for the same power rating as larger casings, so are perfect for anyone with limited space or a constrained budget.
Monocrystalline panels are black or dark blue and are slightly better prepared for excess heat than polycrystalline panels. They have 72mm half-cut cells. Below we have explained that these cells generate more power over extended periods and are the most efficient at 17-22%. They take up less space as most of them come in compact sizes. Monocrystalline refers to a cylindrical silicon structure called an ingot, produced from single-crystal silicon, a semiconductor.
Why Monocrystalline are best AC Solar Panel?
Monocrystalline PV panels are highly efficient and high-performing, and hence they are best for AC solar panels. Manufacturers make these panels from a single piece of silicon. This means that the flow of electricity becomes much better. The silicon structure is uniform, and this means that there is less interference in the flow of current, hence higher efficiency levels. Also, monocrystalline panels have a pyramidal cell structure. Polycrystalline PV panels are composed of melted and fused silicon pieces, increasing the surface area exposed to the sun’s rays.
This special design makes it possible for the panels to collect more energy from the sunlight, resulting in a higher energy yield compared to other types of solar panels. On the other hand, polycrystalline PV panels are made from multiple silicon pieces that are melted and fused together. This process creates a kind of interference in the panel and does not allow electricity to flow as smoothly as before.
Thus, polycrystalline panels are somewhat less effective than monocrystalline panel material, as seen below. Similarly, thin-film PV panels, which can be made of single or multiple layers of thin material, are less efficient than other types of panels available in the market. For these reasons, the solar market considers efficient, monocrystalline solar panels to be of the highest quality. Durable, energy efficient, and highly efficient, they are the best choice for anyone looking to buy the best AC solar panels.
Monocrystalline AC Solar Panel Price in India
The price of a standard monocrystalline AC solar panel in India typically ranges from ₹25,000 to ₹50,000. These panels are known for their efficiency and durability, and they usually come with a 20 to 25-year warranty, which ensures long-term performance. The price typically includes essential components such as the AC solar panel, a micro-inverter, a panel stand (made of galvanized iron), connecting cables, an energy meter, and other necessary accessories.
Technical Specifications:
1. AC output as per home electricity like 230 V, single phase
4. AC output current approx 1.15 amps
2. Protection: IP 67, water and dustproof
5. Weight: 25 Kg.
3. Dimensions: It will vary depending on the solar panels
6. Warrenty: 20-25 years
Use of Monocrystalline or Ac Solar panel in Homes?
Homeowners commonly use monocrystalline solar panels because of their efficiency and easy integration with home power systems. Solar panels convert energy from sunlight into direct current (DC), and then into alternating current (AC) for use in home appliances. This makes the system easier to install and loses less energy than systems that use a separate inverter. Monocrystalline AC provides power to multiple devices in the home, reducing electricity bills and dependence on power from the grid. The installation of these panels ensures a stable, continuous energy source, contributing to the creation of an environmentally friendly, energy self-sufficient home.
Why choose Solar Sense for Monocrystalline AC Solar Panel?
Solar Sense is a leading dealer and supplier of various types of solar panels including monocrystalline AC solar panels. Solar Sense is located in Azadpur and provides solar system related services all over Delhi including solar panels for home and commercial purposes. The company not only provides the best solar panels but also works to make people aware of the need to save the few remaining resources as well as their effects on the environment. When you choose Solar Sense, you not only get quality solar technology; it also becomes your way of supporting the cause of effective energy conservation in society.
Net metering is a system that enables consumers to produce excess energy from their solar panels so that they can send it back to the power grid and earn credits. One benefit of such a system is that the owner of solar power can earn credits in exchange for excess energy added to the grid. These credits can be used to reduce energy use when solar generation is low. For example, during cloudy or rainy weather.
In India, although net metering exists, different states vary in how they award and calculate credits and how they use those credits. Due to existing state laws and policies in the field of implementation. There may be different state laws regarding net metering, compensation basis, eligibility requirements, and net metering application process.
What is net metering?
Net metering can be described as a system of billing in which solar energy system owners receive credits from the electricity they send back to the grid. This enables domestic and corporate customers to send surplus energy generated from solar panels or photovoltaic systems to the grid. Thus providing an opportunity to earn even more money from the grid as one buys only as much as is needed to make up for the shortfall by selling the excess electricity produced.
In India, net metering was brought in by the government to try to reduce the cost of renewable energy which citizens cannot afford. Most states charge customers for their “net” energy usage and typically 20-40% of a solar energy system’s output is sent to the grid. The government therefore introduced net metering to ensure that all its citizens are able to afford and access renewable energy.
How Does Net Metering Solar Work?
Net metering is a billing mechanism that facilitates the determination of the net energy consumed by all solar panel owners by evaluating the production output of the system and comparing it with the electricity consumed by the household. The panels send any excess energy to the grid, reducing the overall energy cost. If solar power generation is insufficient, the home draws power from the grid.
The utility company measures the amount of power sent to the grid and the amount of power taken from the grid. For that billing period, the utility company charges customers based on their net power usage, reflecting any loss or gain of power from the grid. Net metering also smooths out demand fluctuations, allowing homeowners to reduce electricity costs during high solar power generation. During periods of low solar generation, they increase power use from the grid without additional cost.
Why does net metering exist?
Policies and Renewable Energy Adoption:
Promotes widespread use of renewable energy.
Benefits utilities by making solar power available at a lower cost.
Makes it easier to break even on electricity costs, especially in the summer (warmer months).
You can also use it in other systems like wind turbines, depending on state regulations.
Solar Power Net Metering and Billing Systems
Net metering sets a net energy usage charge based on the amount of energy used by the homeowner, which is derived by taking the energy produced and subtracting the amount consumed from the energy produced. This includes electricity lost by the customer and electricity consumed from the grid. It also provides a means of earning a profit from excess energy without taking any of the deficient energy out of the grid. States have different rules on what kind of meters must be installed, for example in some places they use only one meter that measures net consumption while others install two meters that measure net production and consumption separately.
Promoting Job Creation and Private Investment
Another benefit of net metering is job creation in the economy. It creates jobs and raises personal incomes as well as investment spending. The rising need for the other sun’s power enhances employment for other players in the business, such as installers, electricians and manufacturers around the solar value chain.State governments’ successful net metering policies have significantly driven the growth of the solar industry, directly employing over 230,000 Americans.
Advantages of Net Metering
Reduces stress on the grid’s distribution and transmission networks.
Provides additional compensation in case of excess energy generation relative to energy used.
Conserves surplus energy, eliminating the need for batteries and auxiliary generators.
Cheaper and lower-maintenance processes reduce the need for various components.
Get in touch with Azadpur
Ready to make the switch to Solar Panels?Contact Solar Sense today to schedule a consultation. Also, find out how we can help you utilize the power of the sun.